This is a slightly expanded article about the No-waste central line draw from the INS 2021 update. I’ve posted about this method many times on Instagram, but tons of you have asked me to link the studies. I’ve included a few links at the bottom for those who want to see the evidence.
.
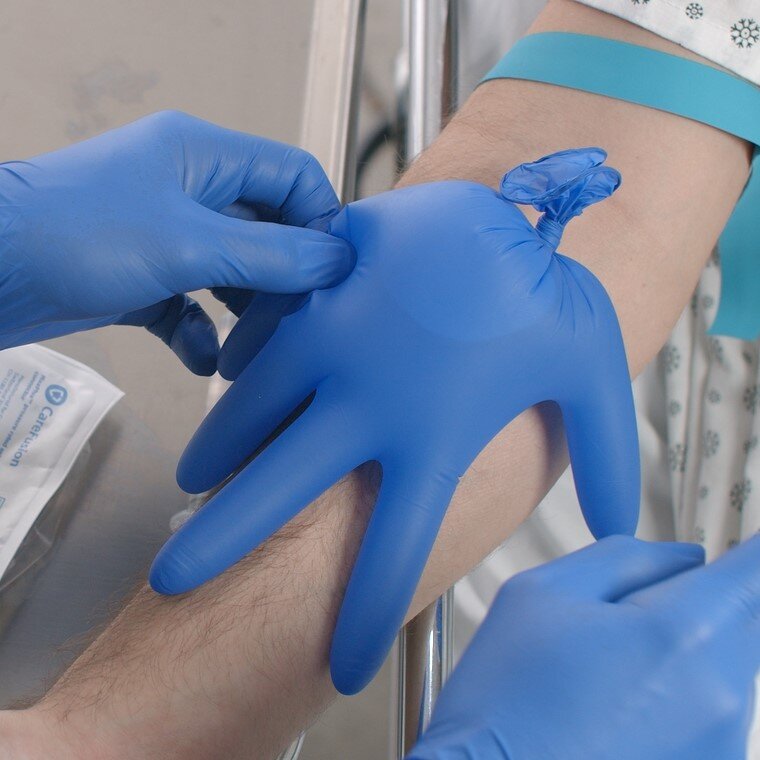
First off, always follow your hospital protocol, so look up the policy/procedure before you start. Going outside of hospital protocol when drawing blood, accessing VADs, or inserting PIVs can often be considered patient endangerment by the facility or hospital system and end in termination of employment or worse if the patient is harmed in any way. Pretty serious stuff. If this is outside of your protocol and you think it should be implemented, contact your administrators to see what the process is like at your particular facility.
.
Steps of the procedure:
1) Cleanse the needleless connector with alcohol for at least 15 seconds.
2) unclamp the line (if there’s a clamp)
3) flush with 10ml saline in a push-pause manner
4) draw a waste of 4-6ml and flush it back to the patient. REPEAT THIS 4 TIMES.
5) draw your labs using either a syringe or access device. .
**Make sure not to draw back the syringe more than 3ml at a time to prevent hemolysis. I see too many nurses pulling the plunger all the way back and letting the syringe fill with blood. This is way too much suction and will likely lyse red blood cells.**
6) flush the line again in the same manner with 10-20ml saline. It may take more than one syringe to clear the line of blood, then clamp (if there’s a clamp in place).
7) transfer your blood in the correct order of draw using a transfer device.
.
Try to transfer blood as soon as possible to prevent the specimen from clotting, and invert tubes according to policy (typically 8-10 times) for proper mixing of blood and additive.
.
Ok, so, WHY do this method at all?? The main argument is to save the patient from needless wasting of blood, which can add up and cause anemia and may require a blood transfusion. This is generally referencing more extreme cases where a patient is requiring frequent blood draws, but if it causes no additional harm to begin with, why not make it standard? The INS SOP, like me, merely suggests this be evaluated and implemented if a hospital sees fit.
.
Why not simply draw your waste, set it aside, then give the blood back at the end of the draw? This should NOT be done for a couple reasons. First, the chance of the blood clotting while sitting in the syringe is quite high. If this blood is given back, it could potentially introduce clots and cause stroke, heart attack, PE, etc. The second reason is an increased chance of infection (CLABSI). Drawing a waste and setting it aside, then reconnecting the same syringe later give ample opportunity for bacteria to be introduced.
.
What about using a VAMP? VAMP systems are closed waste systems typically associated with arterial lines, but can be used on some central lines as well. These are GREAT in my opinion and work quite well for this purpose. If you have access to them and it falls within the hospital’s protocols, by all means use them. Unfortunately they are quite expensive so most facilities won’t allow them to be used in the circumstances we’re talking about.
.
Links - Pubmed Overview, Penn Overview, Pubmed Lab Results Accuracy
.
Please feel free to ask any questions you might have either through email Brian@theivguy.com, or on Instagram or facebook @theivguy. I’m always happy to chat 😊
.
If you’re interested in any of my video courses, click HERE or on the “Courses” tab above. They’re all 30% off right now, with bigger discounts for bundles of 2 or more courses. They also come with CEUs from an ANCC accredited provider, so in many cases the cost is eligible for reimbursement from your employer, which makes them FREE!